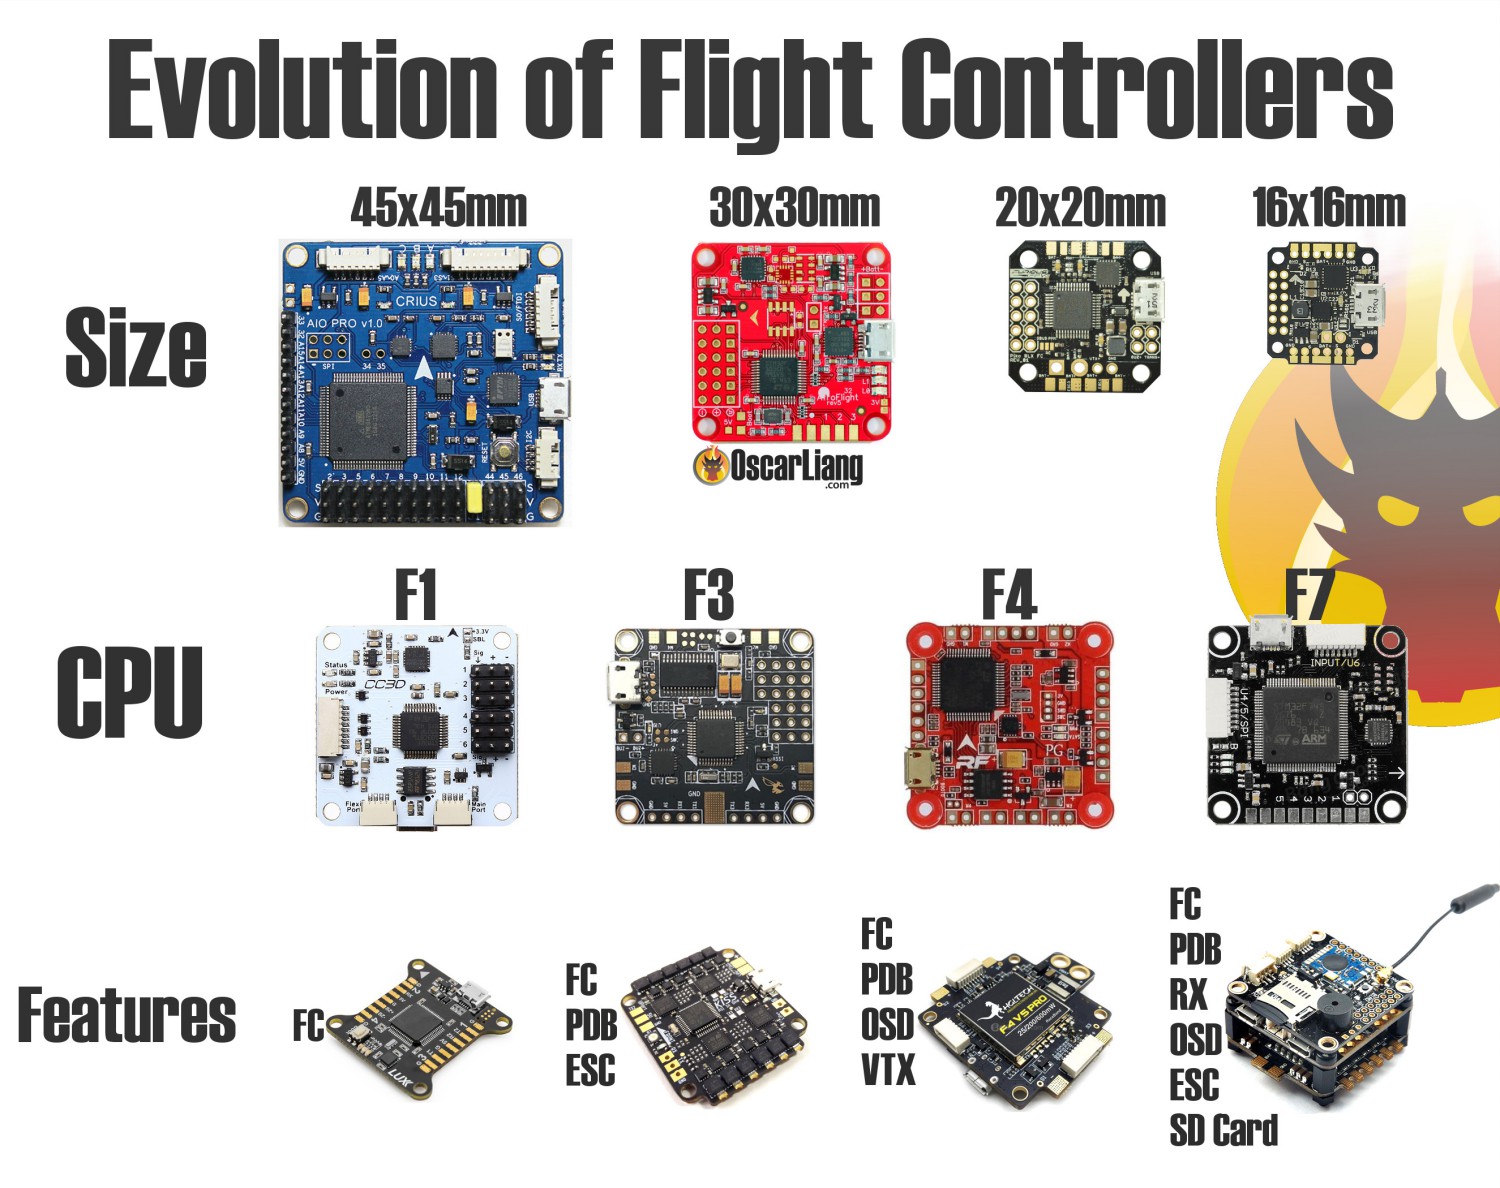
DIY Mini Drone Free Flight Circuit Diagram # How to Build a Flight Controller using a Microcontroller  we use esp8266 as a flight controller. Flight control board. This is one of the most important things to control the drone from the ground. There are a number of flight control boards on the market. Some of them are open source and some of them are not. The following list has the most famous
On the top left of the window, select the port your flight controller is on and click on start. Sensor Values should show on the application. On the right, select the sensor type. To calibrate the sensor, slowly move/tilt the flight controller as prompted. A model of the desired drone should appear on the application.
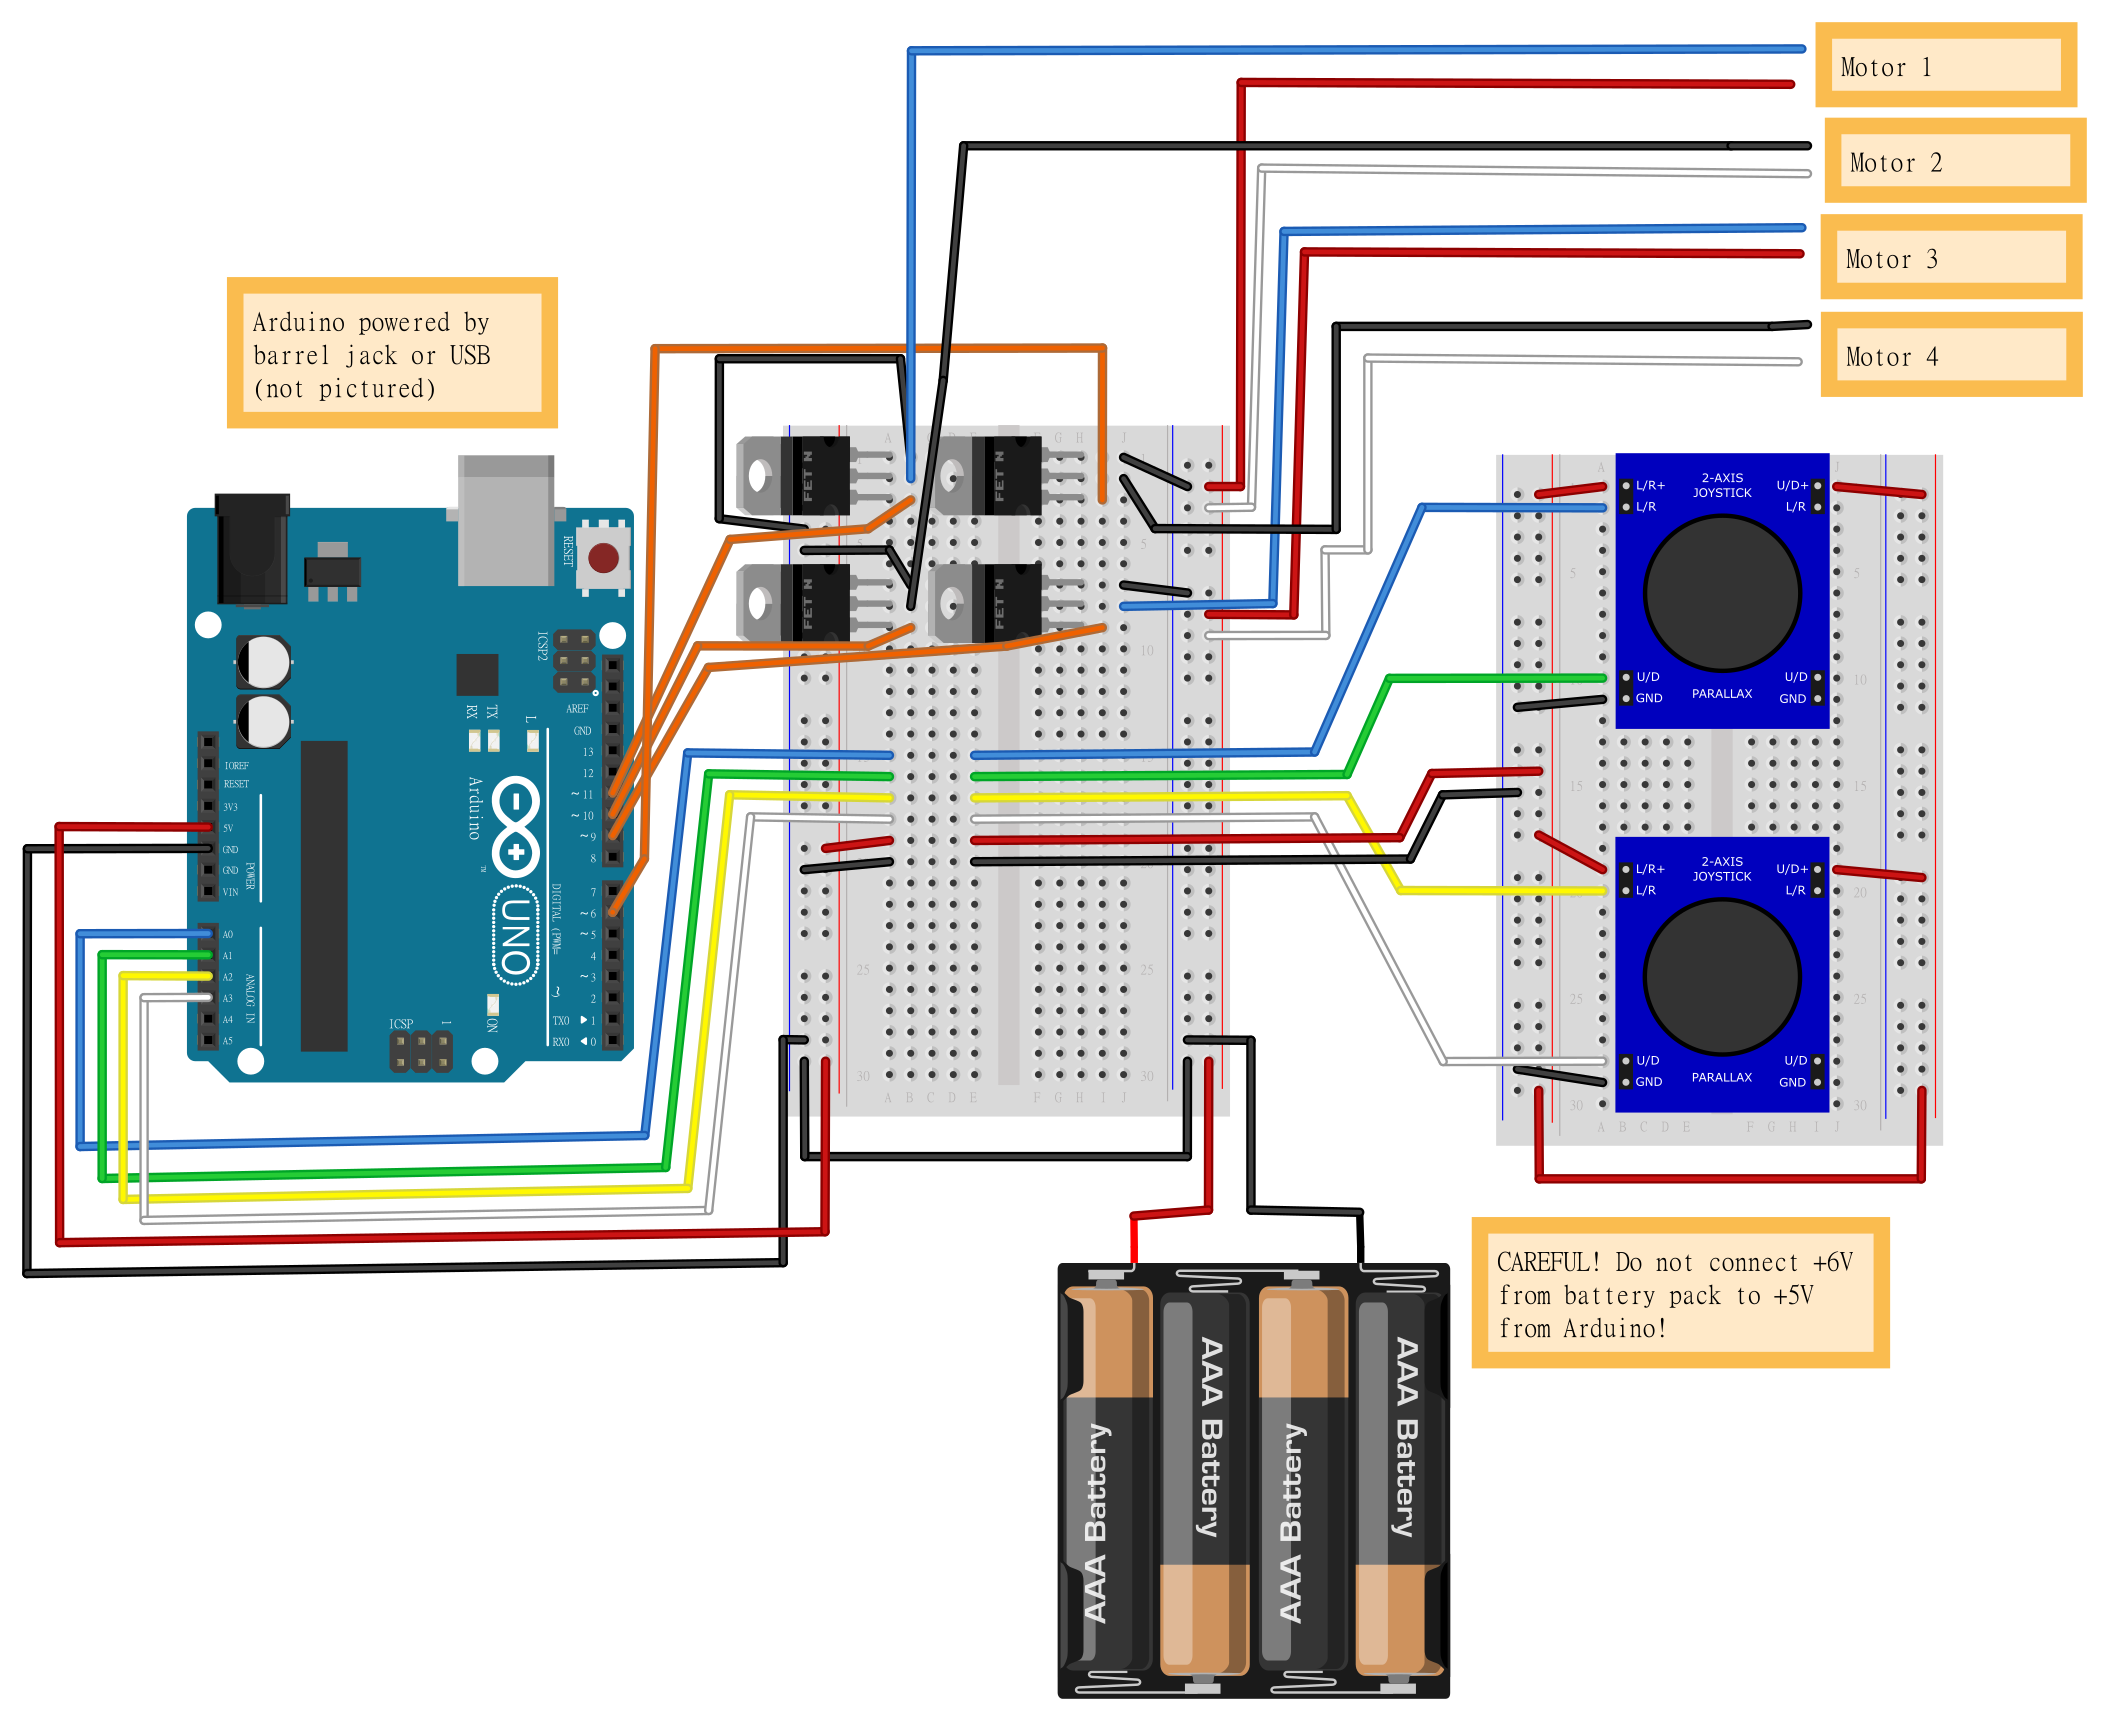
Build ESP8266 Flight Controller For Drone Circuit Diagram
The primary components of a drone flight controller include: Microcontroller Unit (MCU): The MCU is the central processing unit that executes flight control algorithms and communicates with other components. Sensors: Accelerometers, gyroscopes, and barometers provide data on the drone's orientation, angular velocity, and altitude.
As an electronic engineer and FPV drone pilot, making my own flight controller has been a project around for a while. I finally get it done, so let's dive into the design process of a Betaflight based flight controller. To get the most noise-free video, I decided to power the whole video circuit (i.e camera and OSD chip) from the same

DIY ARDUINO FLIGHT CONTROLLER : 12 Steps Circuit Diagram
A drone controller, also known as a drone transmitter, is a handheld device that sends commands to a drone, allowing it to take off, land, and perform various flight maneuvers. The primary purpose of a drone controller is to provide a secure and reliable connection between the pilot and the drone, allowing for precise control and navigation.

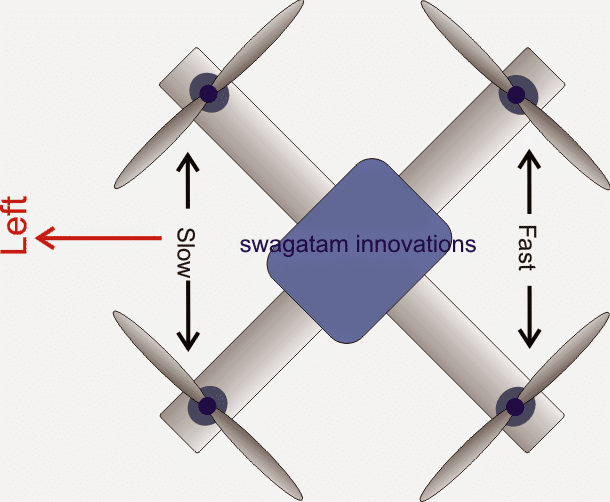
2. To make the dashboard move calibrate the Acc first by putting your FLight controller on a flat surface and hit the calibrate ACC leave it for 10 seconds or so and then calibrate your Magnetometers, After clicking CALIB_MAG you are given 30 sec to rotate your Flight controller in all axis make sure it reaches 360 rotation. 3. Once the flight controller is calibrated, the pilot can then start flying the drone. To do this, the pilot will use the throttle channel to increase or decrease the speed of the drone's motors. The pitch channel is used to control the angle of the Drone. Circuit Diagram - ESP8266 Flight Controller